Create colorized mazes from an image

You can turn any image into a colorized maze: a solvable maze where your photo is visible in the paths (cells) behind the walls. The fastest way is Easy Mode (below). For full control over filters and placement, use the standard modal menus.

Using Easy Mode for colorized mazes

Easy Mode keeps everything on one screen: choose your image, set Background to Colorized, tweak detail and cell size, then generate. No need to open Color & style or Image menus unless you want to refine further.

1. Open Easy Mode and choose Upload Image

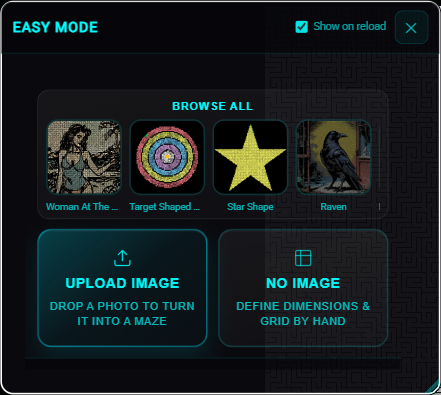
Go to Maze → Easy Mode.... On the landing screen, click Upload Image (or drop a file onto it). You can also pick a sample from the rail or open Browse all first if you prefer a preset.

Easy Mode landing with sample rail, Browse all, Upload Image, and No Image.
Use Upload Image for your own photo, or start from a sample thumbnail.

2. Upload your image

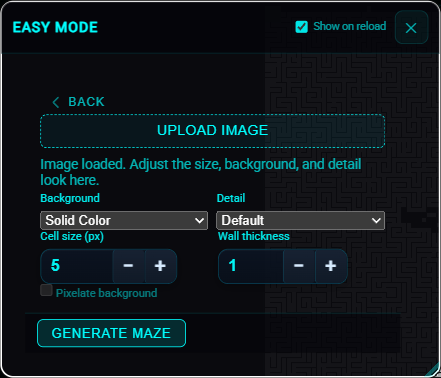
Select a file from your device. Once it loads, the image step shows Background, Detail, Cell size (px), Wall thickness, and (when colorized) Pixelate background.

Easy Mode image panel after uploading an image.
After upload, adjust pattern and size settings in one place.

3. Set Background to Colorized

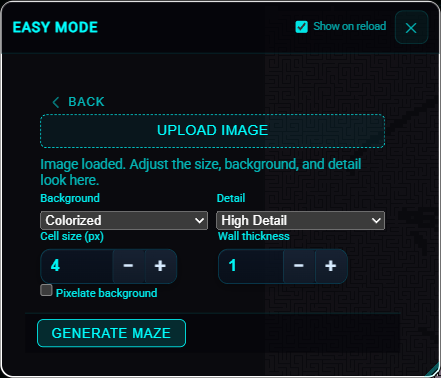
In the Background dropdown, choose Colorized. Your image appears in the maze paths instead of a solid fill. Optionally set Detail to High Detail or reduce Cell size (px) for more visible image detail. Turn on Pixelate background if you want a blockier look in the paths.

Easy Mode with Colorized background and High Detail selected.
Colorized plus High Detail or a smaller cell size makes your photo read clearly in the paths.

4. Generate and export

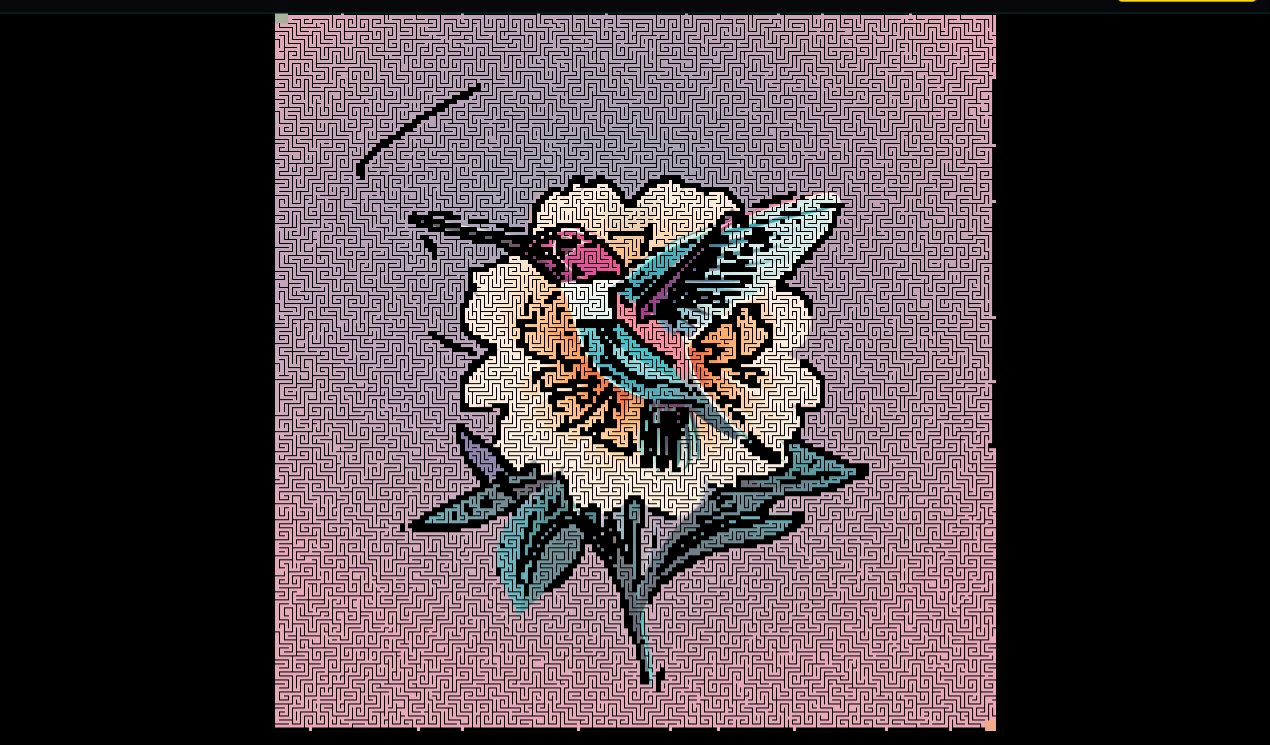
Click Generate Maze. Easy Mode closes and the maze appears in the workspace. For wall colors, advanced background presets, filters, or placement, use Maze and Image after generating. Use the zoom controls to inspect, then File → Export Image to save a PNG.

Generated colorized maze in the workspace.
Your colorized maze in the main workspace, ready to export or refine in the full menus.

For the full Easy Mode walkthrough (samples, no-image mode, and all options), see the Help → Easy Mode section.

Using the standard modal menus

To create a colorized maze using the main app menus:

  1. Upload or choose an image: Open Image then Upload New to select a photo from your device, or use the image gallery to pick a sample. This image drives the maze pattern and will appear in the paths when you use a colorized background.
  2. Set the background to show your image: Open Maze then Color & style. In the background section, set Background preset to one of the colorized options: Colorized Faint, Colorized Light, or Colorized. These presets use the pattern image as the background (Mirrored mode) and lower the path opacity so your image shows through. You can also set Background mode to Mirrored manually and adjust Cell / Path color and Background opacity to get the look you want.
  3. Optional: tune the pattern: Use Image → Filters to adjust brightness, contrast, or edge detection, and Image → Placement to scale and position the image within the maze canvas.
  4. Generate and export: Click New Maze to generate a solvable maze. Use File → Export Image to save a high-resolution PNG for printing or sharing.

Open Maze Generator